“Khatta Meetha Sitaphal”


khatta meetha Sitaphal

Ingredients of Khatta Meetha Kaddu

  • 750 gm pumpkin (kaddu/sitaphal)
  • 1/2 cup oil
  • 1/8 tsp asafoetida (heeng)
  • 1 tsp fenugreek seeds (methi dana) – roasted and pounded coarsely
  • 1 tsp fennel seeds (saunf) – roasted and pounded coarsely
  • 1 tsp cumin seeds (jeera) – roasted and pounded coarsely
  • 1 Tbsp thinly shredded ginger
  • 3-4 whole red chillies
  • Salt – to taste
  • 1/2 tsp turmeric (haldi)
  • 1 tsp red chilli powder
  • 1 Tbsp coriander (dhania) powder
  • 1 tsp garam masala
  • 1 Tbsp sugar
  • Tamarind pulp made from 20 gm tamarind
  • 1 Tbsp chopped coriander (dhania) leaves to garnish

Making of Khatta Meetha Kaddu

  • 1.Peel the pumpkin if using the red variety. Scoop out the fibres and seeds in the centre before cutting it into 2-3 cms cubes.
  • 2.Heat the oil in a kadahi and add the asafoetida, the coarsely pounded fenugreek, fennel and cumin seeds. When they begin to splutter, add the ginger and the whole red chillies.
  • 3.Sauté till lightly coloured and add the pumpkin.
  • 4.Stir-fry on high heat till it looks glossy.
  • 5.Add salt, turmeric, garam masala, coriander powder, chilli powder and sugar. Mix well.
  • 6.Reduce heat, cover and simmer till cooked through. Stir 3-4 times.
  • 7.Add tamarind, cook for 2-3 minutes, and serve hot, garnished with chopped coriander leaves.
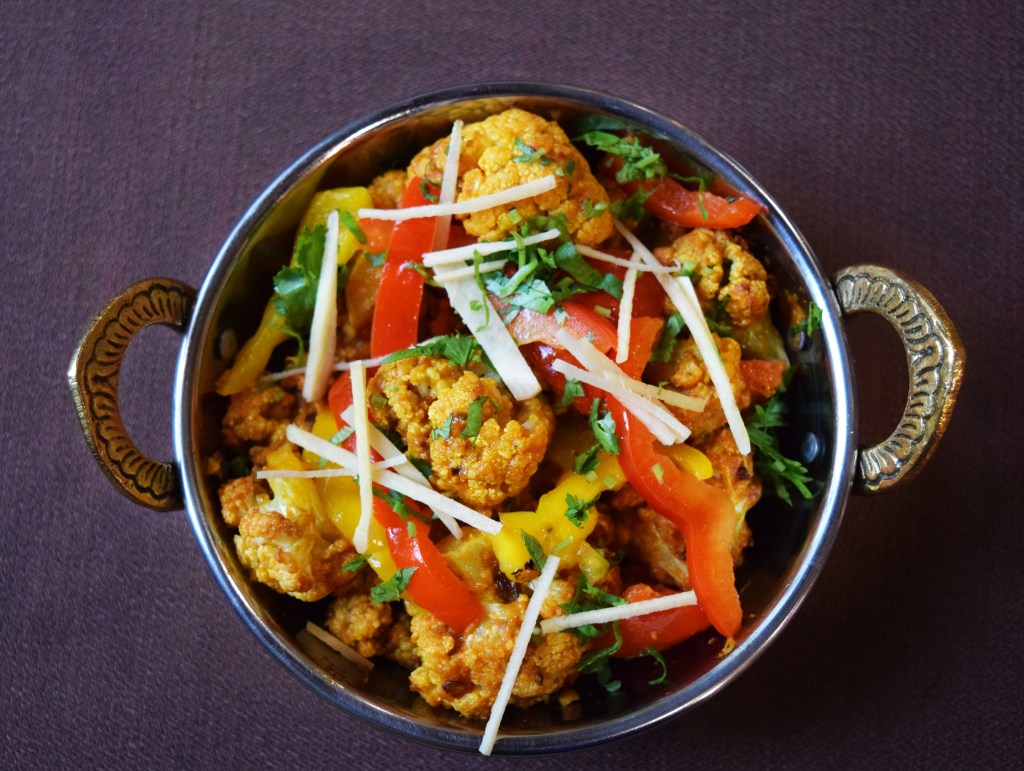
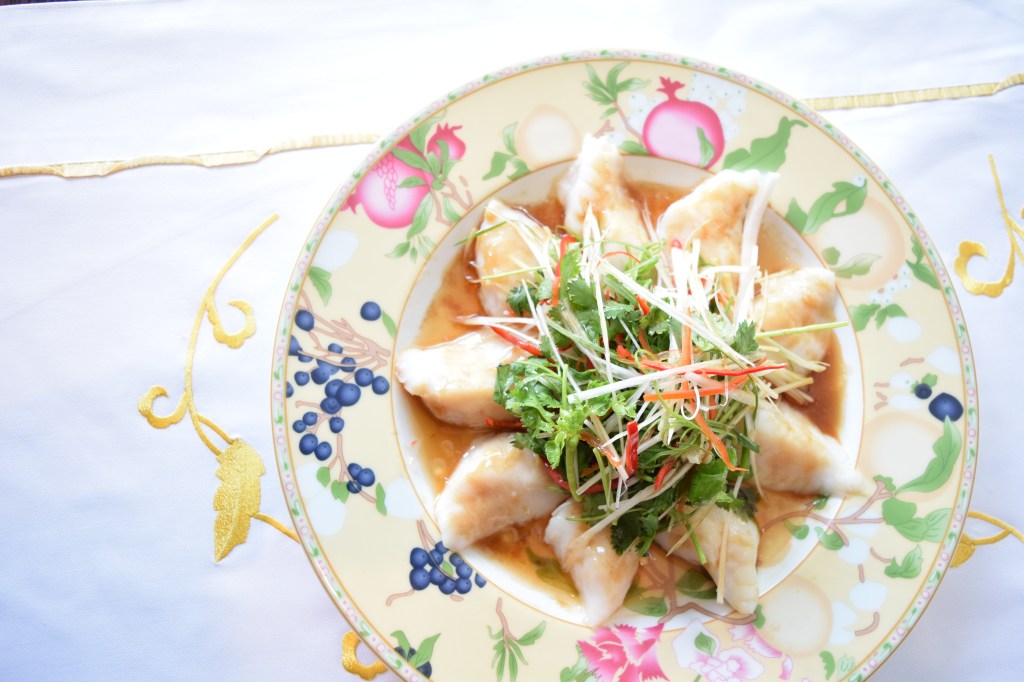
  • Served hot garnished with red yellow pepper and pomegranate seeds.

Please Note

You can serve this heavenly dish with butter roti/bread or with parathas, you will never ever forget this nectar special recipes for ages.

“Spaghetti Pomodoro”


Spaghetti Pomodoro

Ingredients for making the pasta

  • 3 Tbsp. kosher salt, plus more
  • 1 28-oz. can whole peeled tomatoes
  • 4 garlic cloves
  • 3 Tbsp. extra-virgin olive oil, plus more
  • Pinch of crushed red pepper flakes, plus more
  • 3 basil sprigs, plus leaves for serving
  • 1 lb. spaghetti
  • 4½ oz. Parmesan, finely grated, divided (about 1 cup)
  • 2 Tbsp. unsalted butter
  • Black Olives 3 nos

Follow the step by step for making the chefs special pasta

  1. Fill a large stock pot two-thirds full with water and heat over high to bring to a boil. Once you see the water start to steam, add 3 Tbsp. salt. We know, we know: That looks like a LOT of salt. But salting the pasta water aggressively—it should almost be seawater-salty—is the key to making sure that every noodle is properly seasoned through and through, and is one reason why restaurant pasta tastes better than the stuff you usually make. While you wait for the water, start your sauce.
  2. Open a 28-oz. can of whole peeled tomatoes and drain contents in a colander set over medium bowl. (Whole peeled tomatoes are the only canned tomatoes worth buying, TBH. The diced ones sometimes have weird chemicals added to them to keep the chunks from breaking down. Gross.) Using clean fingers, poke a hole in the tomatoes and shake to drain liquid and seeds from the insides of each tomato, reserving liquid. Shake colander over bowl to separate the solids from all the juices and encourage liquid to drain; set aside.
  3. Smash 4 garlic cloves with the flat side of a chef’s knife forcefully, so garlic breaks up into smaller bits; remove skins. If the cloves are really big, you might need to give them an extra smack to make sure they’re broken up, but don’t bother chopping—the garlic will infuse into the oil you sizzle it in and break down as the sauce simmers.
  4. Working next to your pasta pot, heat 3 Tbsp. oil in a large Dutch oven over medium. (We like using a Dutch oven or a large, high-sided skillet for cooking sauce and finishing pasta; it’s kind of the only thing big enough to toss a whole pound of pasta in without noodles flying everywhere.) Add garlic and cook, stirring often with a wooden spoon, until garlic is golden all over, about 3 minutes.
  5. Stir in a pinch of red pepper flakes, then add drained tomatoes and increase heat to medium-high. The idea here is to concentrate the flavor of those tomato solids before adding the liquid they came in, which will give your sauce a more complex, rounded flavor. Cook, stirring occasionally, until tomatoes are darkened in color, browned and caramelized in spots, and starting to break down, 6–8 minutes. Don’t rush this part! If you aren’t getting color, let it go for another few minutes. Mash with the back of the wooden spoon to form a coarse paste.
  6. Add reserved tomato liquid to pot and stir to combine. Season with a pinch of salt, throw in 3 basil sprigs, and reduce heat so sauce is bubbling at a simmer. Cook, stirring occasionally, until liquid is reduced and sauce is thick like applesauce, 8–10 minutes. If your water isn’t boiling yet, turn off heat under sauce while you wait. If it is, reduce heat to lowest setting and move on.
  7. Add 1 lb. pasta to pot of water and agitate with tongs to prevent sticking. Cook pasta, tossing occasionally, just until lower end of time range given on the package for al dente. If you’re not sure if it’s done, fish out a piece and take a nibble—it should still be slightly too crunchy to want to eat because it’s going to continue cooking in the tomato sauce. Just before pasta is done, use a heatproof measuring cup to scoop out about 1 cup pasta cooking liquid.
  8. Using tongs, transfer pasta from stock pot into Dutch oven with sauce, allowing water to piggyback on pasta into sauce. (That’s right, no draining!) Crank heat under sauce up to medium-high and pour in ½ cup reserved pasta cooking liquid. If you’ve never finished cooking pasta in a pan full of sauce, your life is about to be changed—this process is what ensures that every single noodle is completely coated and infused with saucy goodness, and is pretty much the main difference between a dish of “meh” pasta and one that blows your mind.
  9. Cook pasta, tossing constantly, until sauce is clinging to each noodle and any standing liquid is mostly absorbed, about 1 minute. You still want a saucy consistency, but not watery. If things ever start to look a little dry, just add another splash of that pasta cooking water; if they look too wet, just wait a bit for some more liquid to evaporate.
  10. Slowly sprinkle in half of the Parmesan cheese (you want the grainy stuff with the texture of shaky cheese, not Microplaned), tossing constantly, until it has melted into the sauce. Add more pasta water, a couple of tablespoons at a time, to loosen sauce if necessary—it should be plenty saucy while you’re incorporating the cheese so it emulsifies into the sauce properly. You want the sauce to ooze but still be thick enough to coat the pasta.
  11. Remove pot from heat and stir in 2 Tbsp. butter until melted. Finishing with a bit of butter is almost always a good idea—it makes the finished dish extra glossy and delicious. (Don’t look at us like that—if you think pasta is diet food, you’re kidding yourself.)
  12. Using tongs, divide pasta among bowls, then top with remaining cheese and basil leaves. Top with red pepper flakes and an extra drizzle of oil, if you feel. And there you have it: saucy, glossy Basically Spaghetti Pomodoro. Give yourself a pat on the back, and kiss the jarred stuff goodbye.
  13. you can have a garlic bread as an option along with the pasta.

Please Note

Boiled their pasta carefully, as most of the people love to have it al dante (The etymology is Italian “to the tooth”. … Molto al dente is the culinary term for slightly under cooked pasta).

Kappa Maki Cucumber Carrot Roll


Ingredients for Making Kapa Maki

  • 4 sheets of nori (dried seaweed), cut in half
  • 6 cups prepared sushi rice
  • 2 Japanese cucumbers, cut into long sticks
  • Wasabi 5 gms
  • Kikkoman soy 50 ml
  • Sushi Vinegar 100 ml
  • pickled Ginger 10 gms

Steps to follow while making Sushi

  1. Put a piece of nori sheet on top of a bamboo mat (makisu). Spread about 3/4 cup of sushi rice on top of the nori sheet. Place 1/8 of the cucumber sticks horizontally with carrots on the rice.
  2. Roll up the bamboo mat, pressing forward to shape the sushi into a cylinder. Press the bamboo mat firmly with hands.
  3. Unwrap the bamboo mat and remove sushi roll. Repeat process to make more rolls.
  4. Wipe a knife with a wet cloth before slicing sushi.
  5. Cut the sushi roll into bite-size pieces, served with pickled ginger, wasabi & kikkoman soy sauce.

Please Note

Yo have to per-planned before making the sushi, Boiled sushi rice with seasoning with sushi vinegar, sushi mat, water for smoothness, sushi knife, wasabi and kikkoman soy.

Lebanese Exotic Mezze Platter


Ingredients of the Mezze Platter unlimited variation

  • 2 baby eggplants, sliced lengthwise (1/2″ or so in width)
  • Salt to taste
  • Olive oil 100 ml
  • Hummus 100 gms
  • Moutabel 100 gms
  • 1/2 bell pepper, any color, cored
  • Tazaki 100 gms
  • Babagnouj 100 gms
  • 6 Campari tomatoes, quartered
  • 6 Persian (baby) cucumbers, sliced into spears
  • Pitted Kalamata olives
  • 1 15-oz can good quality marinated artichoke hearts
  • 6 oz Greek feta cheese, cubed (not crumbled)
  • 6 oz baby mozzarella cheese balls
  • 3 oz prosciutto di parma
  • 6 California fresh figs, halved (substituent: seedless grapes)
  • 1 tsp sumac
  • Pita bread or your choice of rustic European bread for serving

Instructions/Brief about the Mezze Platter

  1. Place the eggplant slices on some paper towels and sprinkle with salt. Let the eggplants “sweat out” any bitterness for 20 minutes or so. Pat dry.
  2. Preheat the oven to 400 degrees F. Place the eggplant slices on a lightly oiled baking pan, drizzle generously with olive oil. Roast for 20 minutes.
  3. Meanwhile, assemble the remaining ingredients on a large serving platters. Begin with the two hummus spreads on opposite sides. Place Tzatziki sauce in the cored bell pepper right at the center of the platter. Assemble the remaining ingredients on the platter to your liking. When the eggplant is roasted to a nice medium-brown, remove it from the oven and sprinkle with 1 tsp of sumac powder. Add the roasted eggplant to the platter.
  4. You can cover and refrigerate this mezze party platter; take it out a few minutes before your guests arrive. Enjoy with warm pita and crostini or your choice along with falafel, Khboz, labnah etc.

Please Note

Mezze Platter has got huge variations of all type, its according to your choice and liking, so you can choose the ingredients which you actually want to be in your platter. i give you an example of the small platter as an pic in the recipe..

Master Special Indo -Chinese Chilly Paneer.Cottage Cheese


Chilly Paneer

Chilli paneer is an appetizer that doesn’t require any special reason and can be enjoyed anytime. It is full of tasty and crunchy vegetables which gives this dish a refreshing flavour. This dish basically involves stir-frying the paneer with various vegetables of your choice. The paneer is cooked with soy sauce, green chilli sauce, ketchup and vinegar to give it the spicy and tangy taste. The paneer is nicely cooked such that it melts in your mouth instantly. It’s a great dish for all the paneer lovers. This dish is a localize/Indian twist to the usual Chinese flavours. Chilli Paneer is great to be served as an appetizer for any party or get-together that you are planning to host. If you are inviting some friends over for a session with them then making this dish would be a good idea. This dish can also be prepared for that friend of yours who loves everything made with paneer. Chilli Paneer is an easy-to-make snack recipe which can be prepared at the comfort of your home. So, spice up your tea-time by serving these Chilli Paneer for your loved ones. Making this appetizer for your kids will make them a fan of your cooking skills. They will certainly ask you to make it more often. You can even make a gravy with this chilli paneer to make a complete meal which can be served with some steamed or fried rice. We are here to tell you exactly how this scrumptious dish is made. All you have to do is follow this recipe step-by-steps, given below carefully and your Chilli Paneer will be ready in no time! Do try this amazing appetizer recipe and enjoy with your loved ones.

Ingredients for Chilly Paneer

  • 200 gm paneer
  • 1 tablespoon soy sauce
  • 2 tablespoon tomato ketchup
  • 1/2 teaspoon salt
  • 1 large capsicum (green pepper)
  • 1 large onion
  • 1/2 small ginger
  • 1 clove garlic

To make chilly Paneer Pungent

  • 3 medium green chilli
  • 1 tablespoon green chilli sauce
  • 1 tablespoon vinegar
  • 1/2 cup refined oil

How to make Chilli Paneer

  • Step -1
  • To prepare this yummy appetizer recipe, take a chopping board and chop the paneer, onion and capsicum. Make sure that they are cut in cubes. Wash the cubed capsicums in running water and keep the cubed veggies aside. Now, peel ginger & garlic and chop them in a small bowl. Then cut the green chillies in strips or you can also slice them half.
  • Step -2
  • Next, put a skillet on medium flame and heat oil in it. When the oil is sufficiently hot, add the cubed paneer pieces in it and fry them till they turn golden. Now, put a saucepan on another burner and add two tablespoons of hot oil in it. Immediately, add the chopped ginger and garlic along with slit chillies. Let them saute for a few seconds.
  • Step-3
  • After sauteing them, add the cubed onions in the saucepan. Saute for a minute and then add cubed capsicum, salt along with the tomato ketchup, vinegar, green chilli sauce, and soy sauce. Let the veggies cook for two to three minutes. Finally, add the fried paneer cubes and toss them once. Garnish with chopped coriander leaves and enjoy hot!

Murgh Korma/ Chicken in Buttery Creamy gravy


Murg safeda

Safed Murg Korma / Chicken in White Gravy

Considered to be one of the must try curries of India, Safed Murg Korma is primarily prepared with cashew nuts, poppy seeds, milk, ghee and yogurt. Here is how to make chicken in white gravy. My Granny special recipes which is famous all over the universe.

Ingredients for making the Chicken Safeda

  • 3 tbsp Ghee
  • 3 tbsp Vegetable oil
  • 1 kg Chicken Curry cut
  • 15-20 Cashew Nut
  • 2 tbsp Poppy seeds
  • 2-3 Green chilli
  • 1 inch Ginger
  • 5-6 cloves Garlic
  • 1 cup Yogurt
  • 2 tsp Maida
  • Salt to taste
  • 1/2 cup Milk
  • 1/2 tsp Garam masala powder
  • 2 tsp Lemon juice
  • 1/2 tsp White pepper powder
  • 1/4 cup Fresh cream

Follow the instruction to make the chicken right

  1. Heat butter and vegetable oil in a pan.
  2. Add chicken and fry on high heat for 3-4 minutes.
  3. Make a paste of cashew nuts, poppy seeds, green chilli, ginger and garlic and add it in the pan.
  4. Fry for 3-4 minutes.
  5. Whisk yogurt with maida and add it in the pan along with salt and cook for 2-3 minutes.
  6. Add milk and cover the pan and cook the chicken until it’s done.
  7. Add garam masala powder, lemon juice, white pepper powder and fresh cream and cook for 2 minutes.
  8. Garnish with saffron strands and fresh coriander.
  9. Serve hot with roti, Naan or Bakharkhani Roti, Pulao and steam rice also on the hit.

Please Note

You Can make the gravy in advance to get the actual flavor of the dish/gravy, that gravy can be used for other preparations as well.

Aloo Gobhi Adraki, Traditional North Indian Style


Allo Gobhi Adraki

Aloo Gobhi Adraki

My Personal Favorite Aloo Gobhi Adraki is a North Indian recipe prepared in almost every kitchen. This easy-to-make dish is prepared using fresh potatoes and cauliflower and tossed in some aromatic spices. The dish is perfect for the main dish. The dish can be well served on occasions like anniversary, Birthday, kitty parties or any special get-together. It can be well complemented with any regular meal and can be paired up with cooked rice or even hot chapattis. Try this easy and scrumptious recipe and surprise your guests with your amazing culinary skills. Try my this exclusive preparation to enjoy with your loved ones.

  • 250 gm potato
  • 20 gm ginger
  • 1 tsp red chilli powder
  • 1 cup tomato puree
  • 2 tsp lemon
  • 500 gm cauliflower
  • 2 tbsp vegetable oil
  • 2 tsp coriander powder
  • 2 tsp onion

For Garnishing

  • 1 teaspoon coriander leaves, shredded ginger& Tomatoes Julienne.

How to make Aloo Gobhi Adraki

  • Step 1- Slice the potatoes into finger shapes. After this, fry it in a medium-sized pan along with cauliflower. Take another pan, add all the ingredient and mix it well until it turns golden brown. Now, add the fried gobhi and aloo.
  • Step 2- Chop the ginger and coriander leaves in a bowl. Now, add chopped ginger to the pan and mix well with the rest of the ingredients. Garnish it with chopped coriander leaves, and serve hot.

Please Note

Yo can have this delicacy with Tandoori roti, Naan, Latchi Paratha and Tawa Roti. enjoy !!

Steam Fish Lemon & Coriander Sauce


Steam Fish Lemon Coriander Sauce

Ingredients for Steam Fish

  • 2 lemongrass stalks, bruised and cut in half
  • 2 x 200g white fish fillets (e.g. barramundi, snapper, cod, halibut)
  • lime slices, to serve
  • coriander leaves ,to serve
  • 1 red chilli, finely sliced, to serve
  • sea salt
  • steamed rice to serve
  • Spicy Lime & Garlic Sauce:
  • 4 birds’ eye chillies, roughly chopped
  • 2 coriander roots, roughly chopped
  • 4 garlic cloves
  • ½ tsp sea salt
  • ¼ cup chicken or fish stock
  • 3 tbsp fish sauce
  • 3 tbsp lime juice
  • 1 tsp sugar

Step By Step Instruction of making the steam fish

STEP 1 – For the spicy lime and garlic sauce, use a mortar and pestle to pound the chillies, coriander roots, garlic and salt to a rough paste. Transfer to a bowl and mix with the stock, fish sauce, lime juice and sugar.

STEP 2– Place the lemongrass on a plate large enough to fit your pieces of fish but small enough to fit into your wok or a large deep frying pan with a lid. Place the fish on top of the lemongrass. Season the fish with salt.

STEP 3– Fill your wok or frying pan about ¼ full with water and bring to a simmer. Make a trivet out of foil by scrunching it up into a rough cylinder and coiling it around into a circle. Use tongs to place the foil trivet into the simmering water. Place the plate of fish on top of the foil and push down to secure (the water level should be below the plate). Cover with a lid and steam for 5 minutes. Then remove the lid and pour the spicy lime and garlic sauce over the fish. Replace the lid and steam for a further 6-7 minutes or until the fish is cooked through.

STEP 4– Carefully remove the plate of fish from the pan. Garnish with lime slices, coriander and chilli slices. Serve hot with steamed rice.

Please Note

You can swirl a hot oil on the top, for which you can keep all the fragrant ingredients like fresh coriander leaves, ginger julienne, on the top of the fish and pour the extremely hot oil from the top which will give a very delicate flavor in the steam fish.

Nachos with Tomatoes & Baked Beans


Nachos with tomatoes and Baked beans

Ingredients for making the Nachos

  • 1 Can Baked Beans
  • 1 tbsp Tomato sauce
  • 1 tbsp sour cream
  • 100g mozzarella cheese (grated)
  • flavored nachos chips (Doritos or other)

Make your own style, or take the hint from this recipe, you can create your own plate

Making of the Nachos with tomatoes and Baked Beans

  • In a small pot, pour in the can of baked beans, stir a little to heat it up.
  • Add the tomato sauce and sour cream, stir until color is even and no sour cream flakes can be seen.
  • Keep stirring until it is almost boiling or a little bubbling.
  • Turn off heat to cool a little.
  • Arrange some nachos on the plates, whatever u desire.
  • Scoop the bean mixture onto the chips, distributing evenly on the plates.
  • Sprinkle the grated mozzarella on top and pop the plate(s) into microwave for 1 minute for cheese to melt.
  • Once the Nachos are ready served immediately, (Option 2) or need not to spread the mixture on the top, or else they will get soggy.

NOTES

As soon as tomatoes & bean mixture is scooped on the chips, put on cheese immediately and heat it under the salamander or micro wave it. Delay will in-result to get the nachos soggy.

Dragon Sandwich with grilled chicken and Bacon


Dragon roll with grilled chicken and bacon

Ingredients for making the bread

  • 2 tsp dry yeast
  • 1/2 cup warm water
  • 2 tbsp sugar
  • 3 cups refined flour
  • 2 tbsp wheat flour
  • 1 1/4 cups warm water
  • 3 tbsp butter cold
  • 1 tsp salt

For making the Sandwich

  • 100gms Cooked Bacon,
  • 20 gms mayonnaise,
  • 20 gms Dijon mustard,
  • 200 gms grilled chicken,
  • 1 tsp crushed black pepper

Making of the bread

  • In a stand mixer mixing bowl, combine yeast, 1/2 c. warm water, and sugar. Stir until well combined and let stand for about 10 minutes until nice and foamy.
  • In a separate mixing bowl, combine flour and vital wheat gluten. Add 1 c. warm water to the yeast mixture (in the stand mixer bowl) and add flour/wheat gluten mixture until combined.
  • Attach the bowl to the stand mixer and with the bread hook attachment, mix dough for about 3-4 minutes, adding a little flour if necessary- keeping it a little sticky.
  • You want the dough to be sticky enough that it sticks to the bottom of the bowl a little bit, but not the sides.
  • After 3-4 minutes, cut up 3 Tbsp. of cold butter into little cubes and add to the mixing bowl and add 1 Tbsp. salt. Mix an additional 5-6 minutes until butter is mixed in to the dough, pull the bread down off the hook if needed throughout the mixing process. Again, you want the dough to be slightly sticky and stretchy.
  • Place dough in a large greased bowl and roll around a little to get it greased all around. Cover and allow to rise in a warm place for about an hour.
  • Punch dough down and divide into 3 equal pieces (flour your hands if the dough is too sticky for easier handling). Roll out each piece into a 12″ long loaf (like a fat snake). The dough should be the same thickness all the way across. Place on a non-stick baking sheet (I used a silicon baking mat) or a bread form pan. Cover and allow to rise 40-60 minutes, until dough doubles in size.
  • Preheat oven to 350 degrees.
  • Bake in oven for 12-25 minutes (check at 12 minutes) until bread is golden brown. Remove from oven and lightly run a little cold butter over the top(this will soften it up nicely).
  • Allow loaves to cool completely, then serve with all your favorite sub sandwich toppings!

For Filling the sandwich

Slit the bread for making the sandwich from the center, then spread mayonnaise & Dijon mustard to give the punch in flavor, then stuffed with juicy grilled chicken and roasted bacon, seasoned the stuffed ingredients with salt & crushed pepper, on the upper layer and on the bottom of the bread you can add Romain lettuce also for a eye appeal.

Drizzled with balsamic reduction, and Dijon mustard dip, served with tomato ketchup.